Authentication
Learn how to authenticate with the Notca API using API keys.
The Notca API uses a simple and secure API key authentication mechanism.
Every authenticated request must include an x-api-key header.
Important Note
API keys give full access to your private resources. Treat them like passwords.
How Authentication Works
Authentication in Notca is intentionally minimalistic:
- All private endpoints require the
x-api-keyheader. - There is no OAuth, no sessions, and no refresh tokens.
- API keys belong to your account and can be revoked at any time.
- Missing or invalid keys immediately return
401 Unauthorized.
Getting an API Key
You can generate an API key from your Notca dashboard.
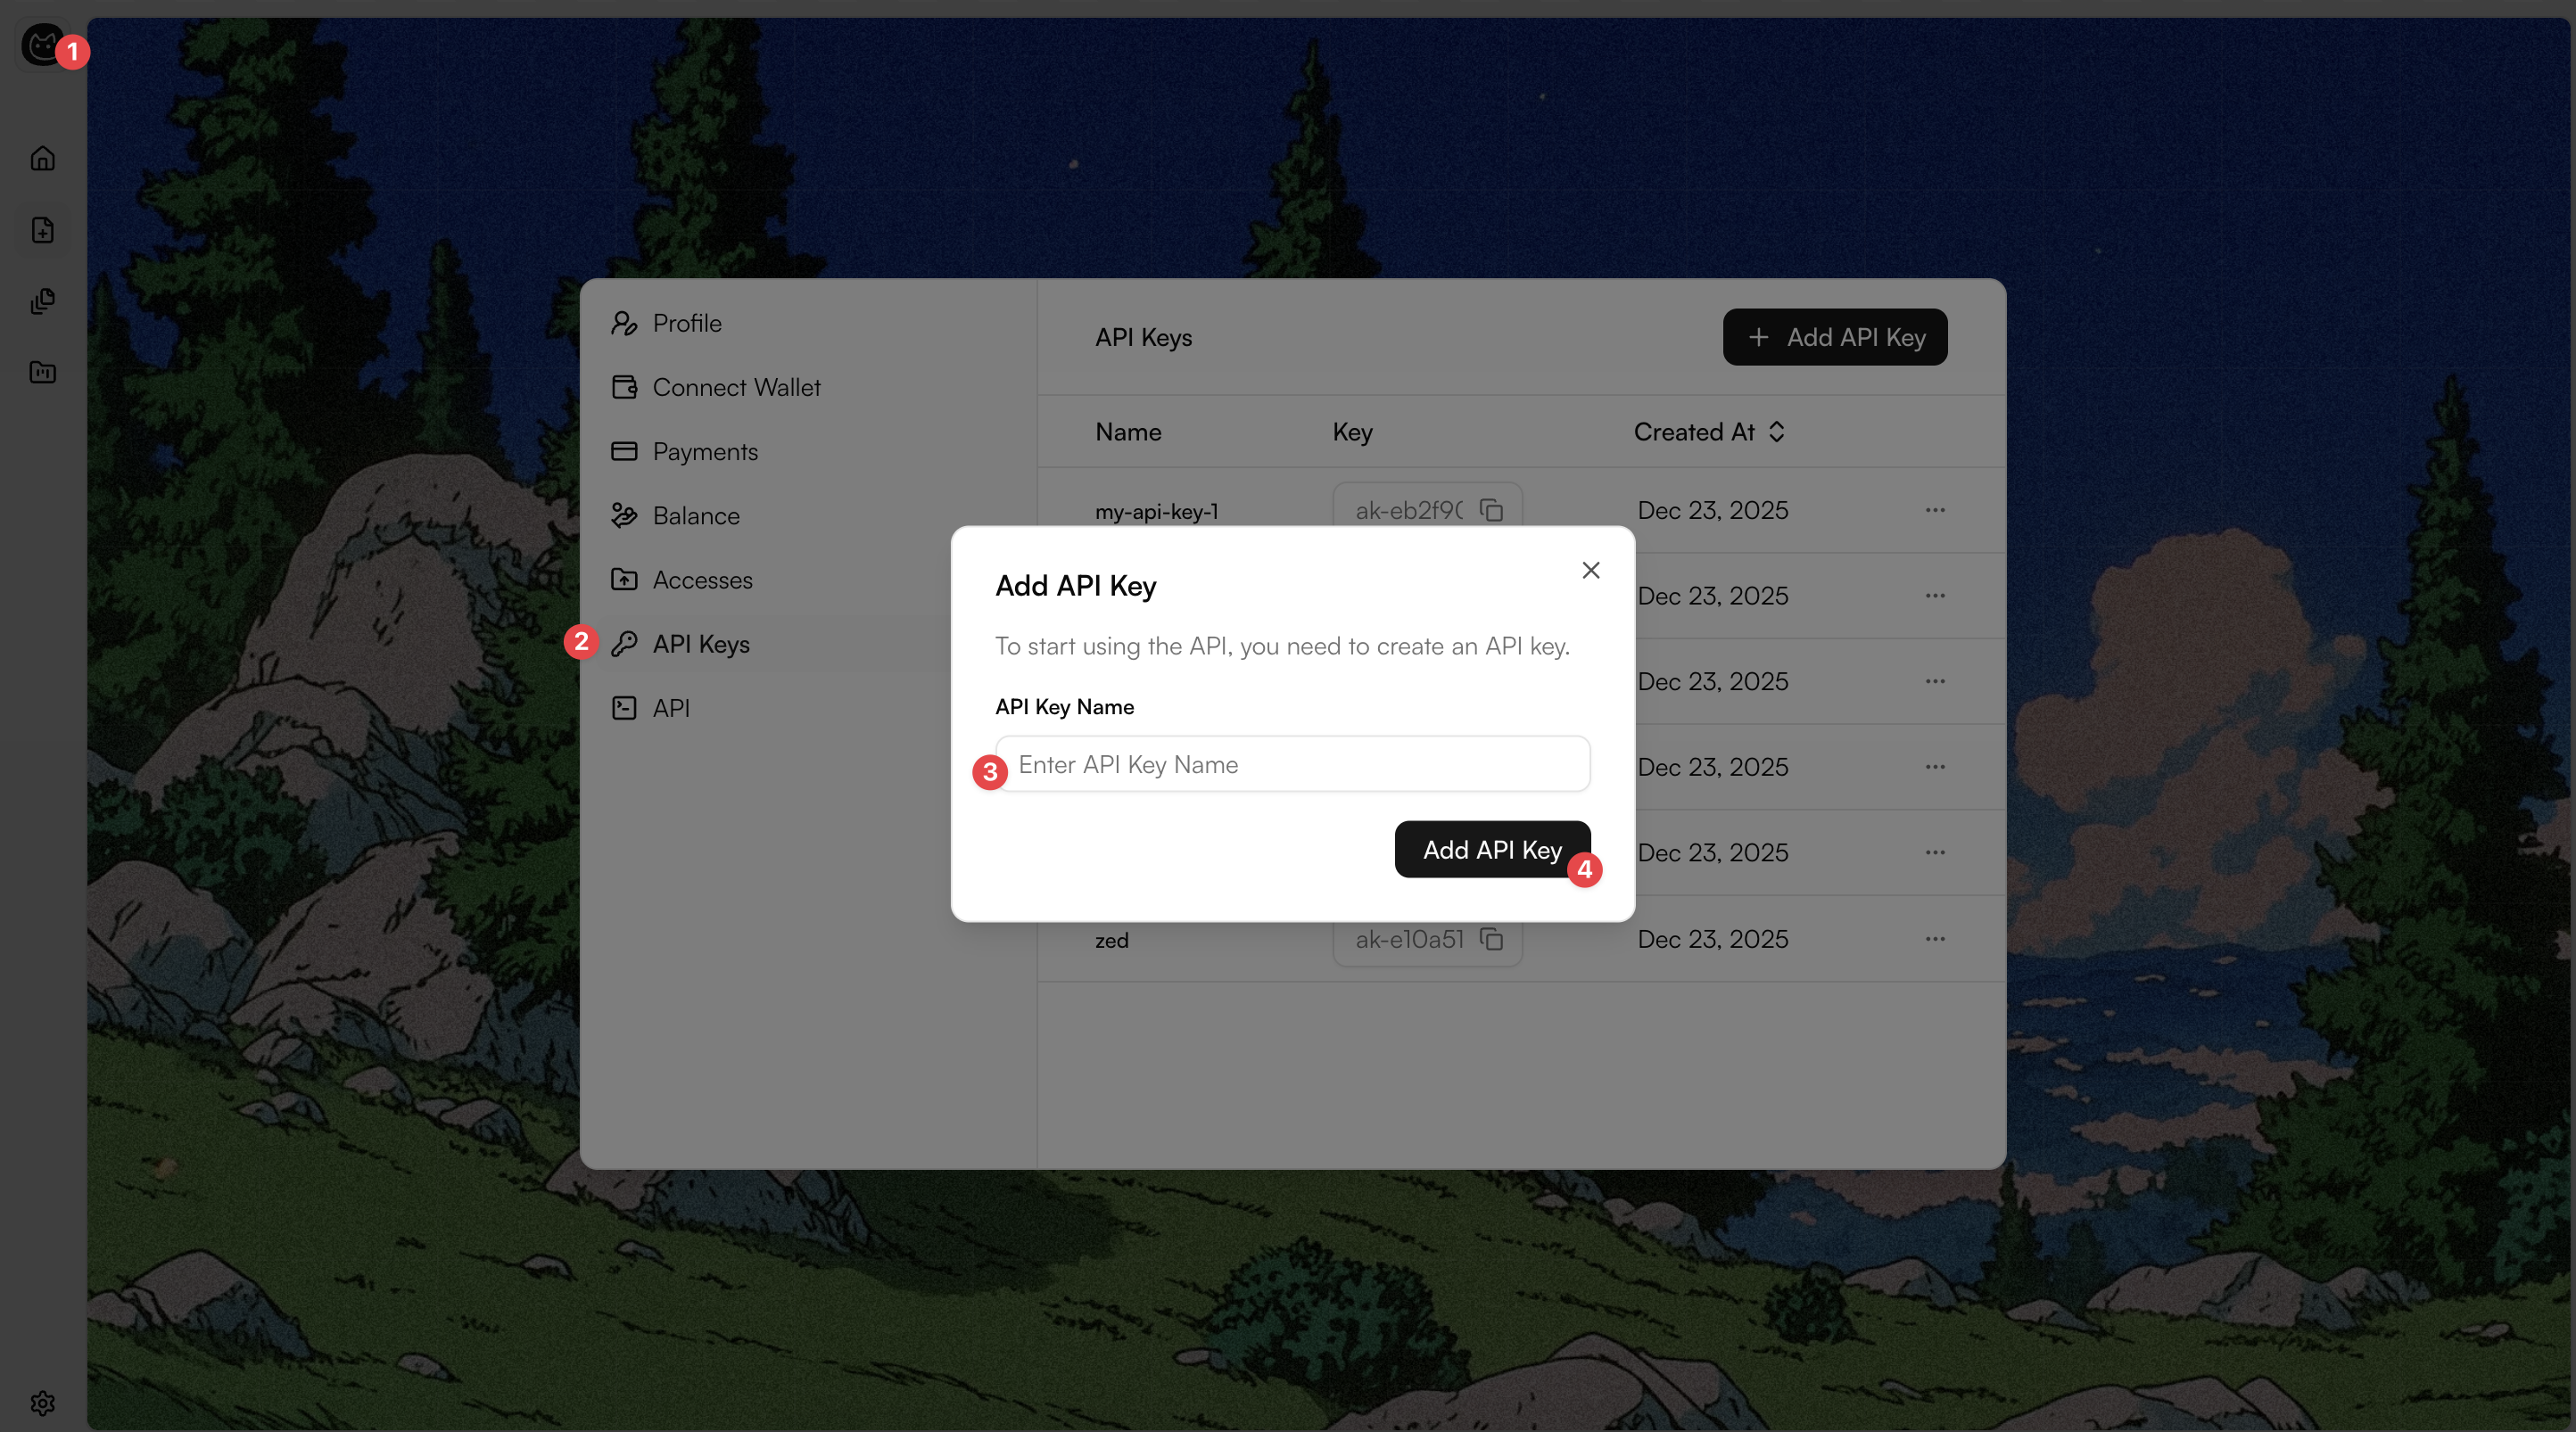
Settings → API Keys
Each API key allows:
- full authenticated access to all your resources
- secure communication from servers, workers, or backend applications
- instant revocation when needed
Keep it Secret
Never expose your API key in client-side code (e.g. frontend or mobile apps).
Making Authenticated Requests
Every authenticated request must include the following HTTP header:
x-api-key: <your-api-key>Examples
curl -X GET "https://app.notca.co/api/v1/notes?page=1&pageSize=20" \
  -H "x-api-key: YOUR_API_KEY"
const res = await fetch("https://app.notca.co/api/v1/folders", {
headers: {
"x-api-key": process.env.NOTCA_API_KEY!,
},
});
const data = await res.json();import axios from "axios";
const res = await axios.get("https://app.notca.co/api/v1/folders", {
headers: {
"x-api-key": process.env.NOTCA_API_KEY!,
},
});
const data = await res.json();